How I created this website using Gitlab pipelines and Gitlab pages
Firstly I needed a simple site generator so I went over to Jekyll found here: Official site.
After running through the installation and local setup of the Ruby dependancies and tested commands that needed to be called, I started with the pipline.
- Created a Gitlab project and repository.
- Cloned the repository to my development machine
- Created the CI yml file that runs the builds.
- Commited and pushed to start the build.
- Setup the dns for the website
- Setup SSL for the website
Steps 1. => 2. are very well documented and I think should not be discussed.
3. .gitlab-ci.yml
This is the file that controls the build tasks and manages the artifcats that are created. The section to take note is:
script:
- mkdir .public
- docker run --rm --volume="$PWD:/srv/jekyll" jekyll/jekyll:3.8.5 jekyll build
- cp -r ./_site/* .public
- mv .public public
In the above section, the script tag is the section that will execute the work on the ‘runner’ which is the machine connected to Gitlab that does the actual work.
NOTE: I run the build in a Docker container, this is to remove the need to have anything installed on the runner.
Once the build has been completed I copy the output to a public folder and then attach the files as an artefact like so:
artifacts:
    paths:
    - public
That allows the files to be accessable to Gitlab to use for the pages feature.
Step 4. is a standard development requirement and will be explained more in detail with some tools and guidlines at a later time.
5. DNS
If you have a third party provider for your dns services the log on to the respective backend service portal and update the dns are per the documented IP addresses for the A record and add the txt record to allow the verfication of ownership to succeed.
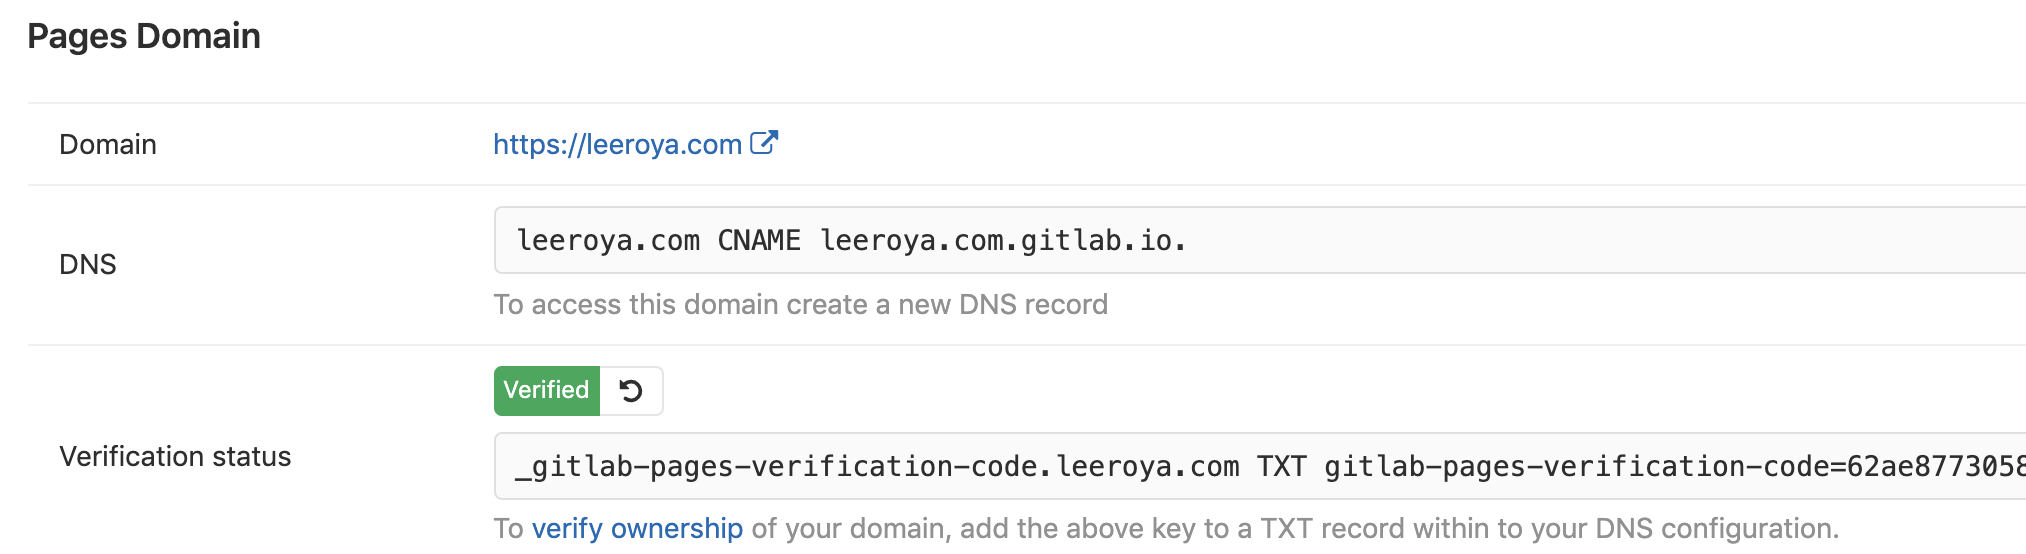
192.0.2.1 is the primary IP address that GitLab is listening to and 192.0.2.2 and 2001::2 are the secondary IPs where the GitLab Pages daemon listens on. If you don’t have IPv6, you can omit the IPv6 address.
For more inforation read: Gitlab Pages Admin
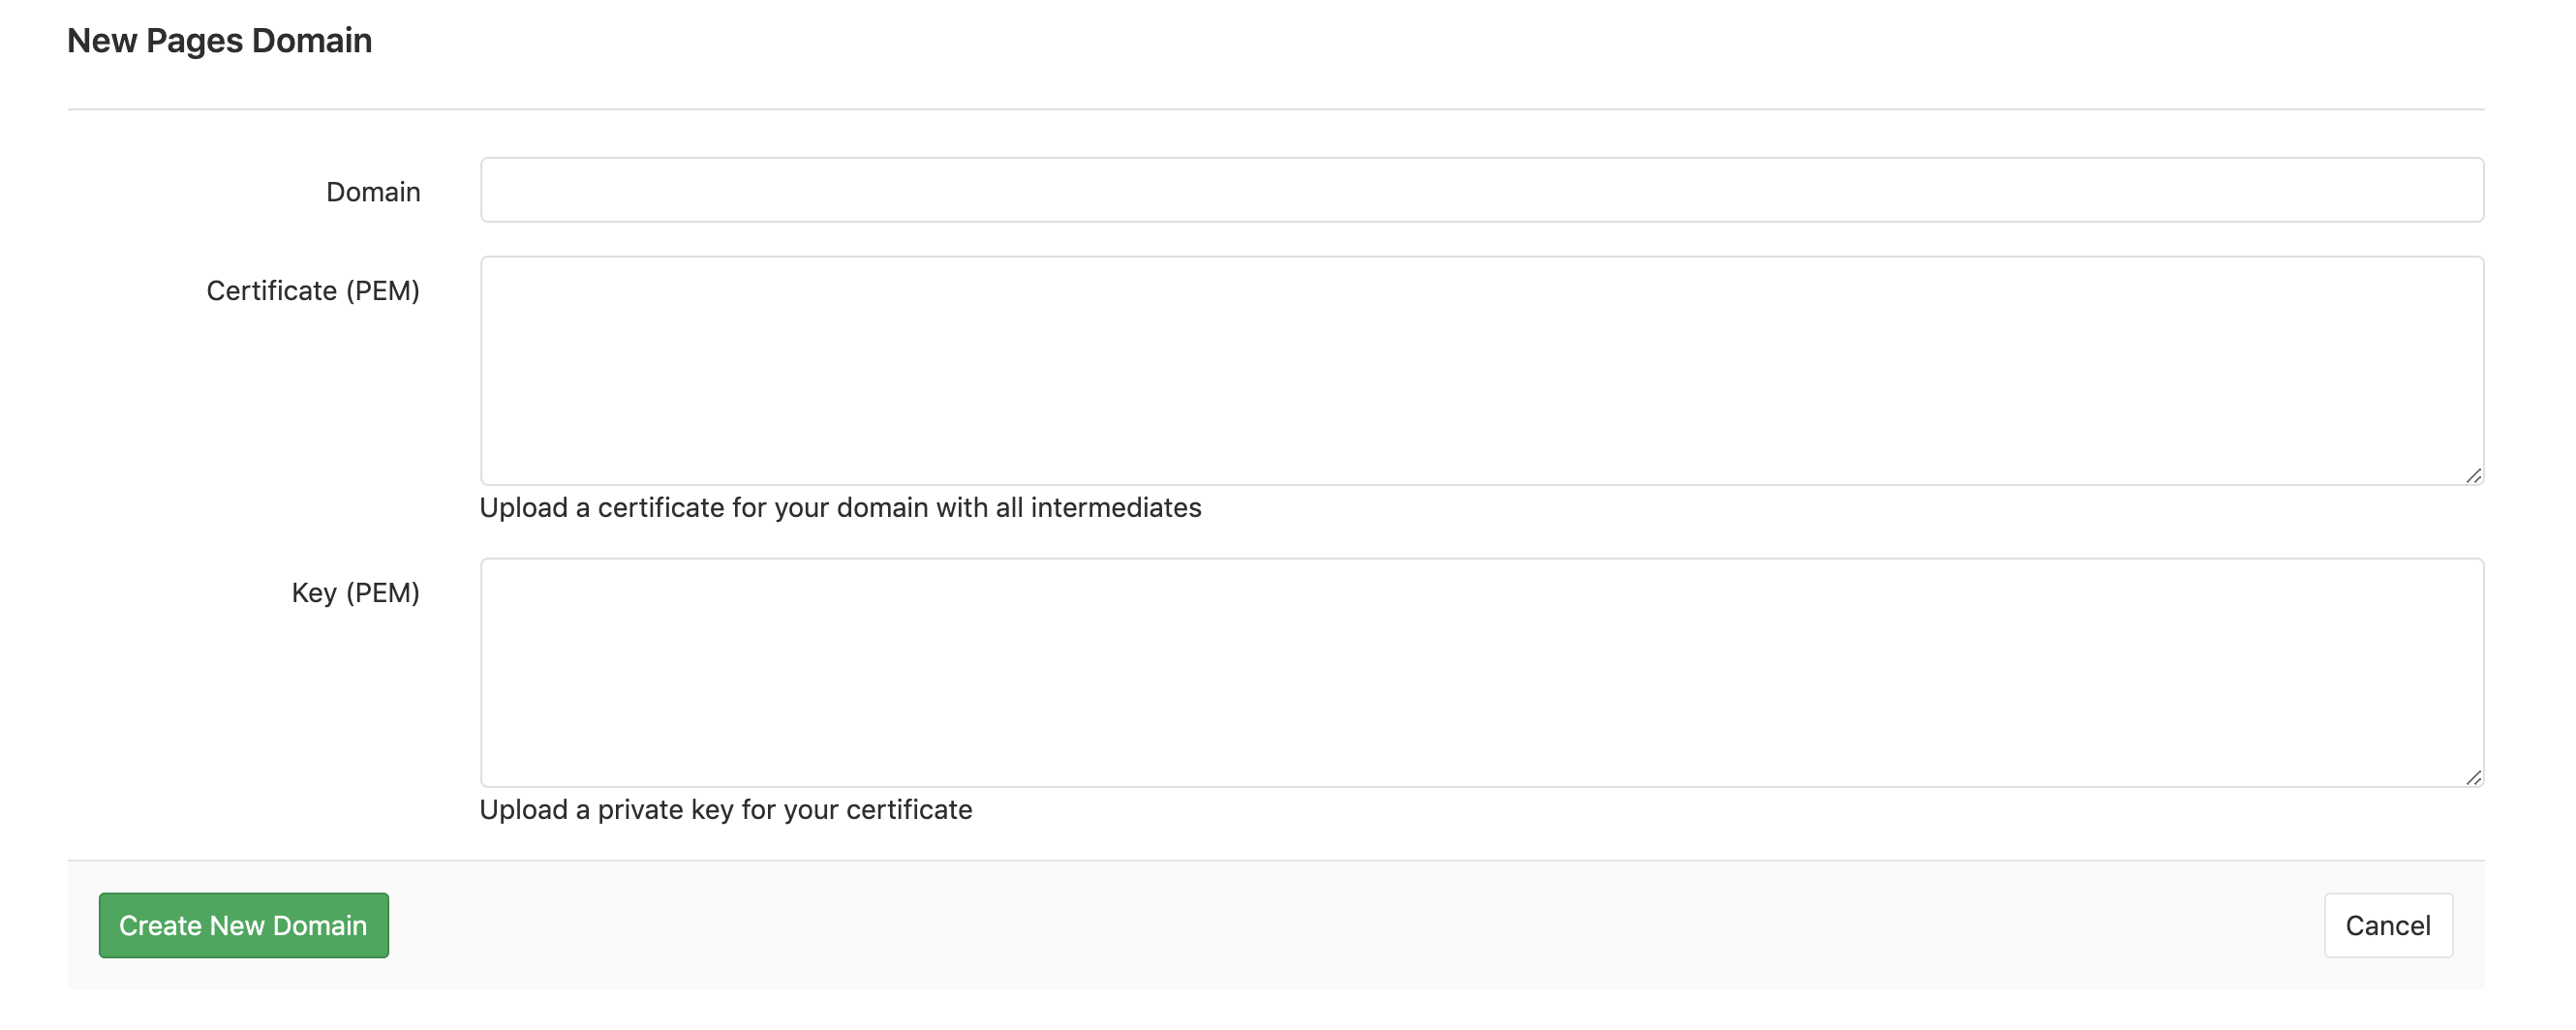
6. SSL
Finally one of the easiest ways to get a free ssl certificate for a site is to use letsencrypt.
Based on the documentation found here: Certbot Manual, after installing cerbot you can follow the following:
sudo certbot certonly --standalone --preferred-challenges http -d example.com
When running the command, you will be prompted to enter an email address and agree to the terms of service. After doing so, you should see a message telling you the process was successful and where your certificates are stored:
Output
IMPORTANT NOTES:
- Congratulations! Your certificate and chain have been saved at
/etc/letsencrypt/live/example.com/fullchain.pem. Your cert will
expire on 2017-10-23. To obtain a new or tweaked version of this
certificate in the future, simply run certbot again with the
"certonly" option. To non-interactively renew *all* of your
certificates, run "certbot renew"
- Your account credentials have been saved in your Certbot
configuration directory at /etc/letsencrypt. You should make a
secure backup of this folder now. This configuration directory will
also contain certificates and private keys obtained by Certbot so
making regular backups of this folder is ideal.
- If you like Certbot, please consider supporting our work by:

Donating to ISRG / Let's Encrypt:   https://letsencrypt.org/donate
Donating to EFF:                    https://eff.org/donate-le
Now that you know where the certs are echo them out copy the values for the respective values and add them to gitlab.com for your domain.